Poppy Playtime – Chapter 3: Deep Sleep represents a massive leap forward in difficulty, complexity, and sheer terror compared to its predecessors. Dropped into the decaying subterranean orphanage known as Playcare, you are no longer just solving simple puzzles; you are fighting for your life against a religious zealot toy, hallucinating through toxic red smoke, and navigating a massive open-world dome. This chapter introduces new tools, brings back old mechanics in twisted ways, and demands a level of situational awareness that can be overwhelming for new players.
Navigating Playcare requires more than just reflexes; it requires a deep understanding of the environment and the behavior of the entities hunting you. From the terrifying stealth sections in the School to the high-octane boss fight against CatNap, every step is a potential game-over. This comprehensive guide will walk you through every objective, puzzle, and monster encounter, ensuring you have the knowledge required to survive the Deep Sleep and uncover the dark truth behind the Hour of Joy.
 1. Surviving the Crash and Entering the Playcare Dome
The chapter begins immediately following the train crash from the end of Chapter 2. You wake up in a trash compactor, disoriented and stripped of your advantages. The first phase of this journey is about regaining your bearings and acquiring the basic tools necessary to traverse the facility. You will need to escape the compactor before the crushing mechanism activates, a sequence that serves as a tutorial for the darker tone of this chapter.
Once you escape the compactor, you will find yourself in the maintenance tunnels. This area is linear but sets the stage for the Red Smoke mechanic. You will encounter a large, cavernous room with a broken cable car. Your primary objective here is to restore power to the transport system. Look for a battery pack located on a high ledge; you will need to utilize the environment to reach it. Once the cable car is powered, you will take a long, haunting ride down into the main Playcare Dome. Pay attention to the phone call you receive here; this introduces Ollie, your navigator and only ally for this chapter. Trust his voice, as he has access to the security feeds.
Upon entering the Dome, you will be struck by the scale of the map. Unlike the linear corridors of the Game Station, Playcare is a hub-and-spoke design. In the center lies the statue of the Smiling Critters. Your over-arching goal is established here: you must redirect power from the various facilities (Home Sweet Home, the School, the Playhouse, and the Counselor's Office) to the central Gas Production Zone to power the elevator. Do not wander aimlessly; the Red Smoke fills the outer perimeters, and stepping into it without protection will result in death. Head immediately toward the first open building marked by Ollie.
Locating the Gas Mask
Before you can tackle the major zones, you must acquire the Gas Mask. This is not optional. The Red Smoke, produced by CatNap, is toxic. Follow the objective marker to the security room near the entrance. inside, you will find the mask.
- Equipping: The mask limits your peripheral vision and muffles sound.
- Usage: Only wear it when necessary (in Red Smoke) to maintain situational awareness.
- Visual Cues: If your screen starts turning red and veiny, equip the mask immediately.
2. How to Navigate Home Sweet Home and Break the Loop
The first major facility you must enter is "Home Sweet Home," the orphanage building. This section is less about physical danger and more about psychological warfare. The Red Smoke has permeated this building, causing potent hallucinations. As you enter, the layout seems standard, but you will quickly realize that the hallways are looping, trapping you in an impossible geometry.
To solve the looping hallway puzzle, you must think outside the box. The game is tricking your perception. As you walk down a hallway, if you turn around, the environment may change behind you. The key to breaking the loops is often to observe the "Do Not Sleep" posters and the behavior of the radio static. In one specific loop, you must walk forward until the lights flicker, then immediately turn 180 degrees to find a new door has appeared where a wall used to be.
The Dream Sequence
You will eventually enter a room that triggers a forced hallucination sequence. You will appear to be shrinking, or the room growing. This is a platforming section.
- Climb the furniture: Use your Blue Hand to grapple onto the enlarged drawer handles.
- Avoid the toys: The seemingly inanimate toys will twitch and move. While they don't attack, they serve as distractions.
- Reach the Radio: The source of the distortion is usually a radio or a TV. Your goal is to reach these objects to "wake up" from the loop.
Once you restore power to the Home Sweet Home generator, the lights will cut out. You must exit the building using the emergency flare lighting. Be warned: this is where you will get your first real glimpse of CatNap stalking you. Do not run; keep your eyes on the shadows and move steadily toward the exit.
3. How to Survive the School and Evade Miss Delight
The School is arguably the most terrifying section of Chapter 3. Here, you are stripped of your ability to fight and must rely entirely on stealth and a specific mechanic: line-of-sight. The antagonist here is Miss Delight, a shattered, insane teacher animatronic who functions similarly to a "Weeping Angel." She can only move when you are not looking at her.
The Encounter Mechanics
As soon as you enter the school and grab the generator battery, the shutters will lock, and Miss Delight will reveal herself.
- Direct Eye Contact: As long as you are looking at her, she is frozen.
- Looking Away: The moment you break line of sight, she moves instantly and silently toward you.
- Blinking: The game simulates blinking or lights flickering. During these split seconds of darkness, she will move.
The Chase Strategy
You must navigate the classrooms and hallways while walking backward. The route is linear but filled with obstacles that you can trip over if you aren't careful.
- Memorize the Path: Take a quick glance behind you to check for desks or fallen lockers, then immediately snap your camera back to Miss Delight.
- Listen for the Mace: Miss Delight drags a heavy mace. If the scraping sound gets loud, she is right behind you.
- The Levers: You will encounter doors that require you to pull levers to open. This forces you to look away from her. Time this carefully. Wait for her to be far away, turn, pull the lever, and turn back immediately.
The Final School Puzzle
The chase culminates in a room with a shutter door that requires a battery. Miss Delight will be aggressive here. You must lure her to one side of the room, sprint to the battery, grab it, and insert it into the door mechanism. As the door closes, she will lunge. You do not need to fight her; the door closing on her will end the encounter violently.
 4. How to Master the Jump Pack (Purple Hand)
After surviving the School, you will gain access to the new GrabPack upgrade: the Purple Hand. This hand replaces the Green Hand for specific sections and introduces verticality to the gameplay. The Purple Hand interacts with purple jump pads located on the floor.
The Mechanics of Jumping
When you shoot the Purple Hand at a jump pad, you must crouch and pull back to build tension.
- The Launch: Release the tension to fling yourself into the air.
- Directional Control: You have limited air control. You must align your jump before you launch.
- Chain Jumping: Some puzzles require you to jump from one pad to another. You must detach your hand mid-air and re-attach it to the next pad instantly.
The Vertical Puzzle Room
You will enter a massive cylindrical maintenance shaft. This area serves as the tutorial and the test for the Purple Hand. The goal is to climb to the top.
- Look Up: Always scout the next landing platform before jumping.
- Timing the Steam: Some jumps are blocked by intermittent bursts of hot steam. Time your launch so you pass through when the steam stops.
- The Swing: Some pads are on walls, converting the jump into a swing. Use your momentum; release the hand at the apex of the swing to get maximum distance.
5. Solving the Playhouse and The Fate of DogDay
The Playhouse is a twisted, dungeon-like area that reveals the darkest lore of the chapter. As you enter, you will find DogDay, the leader of the Smiling Critters, chained up in a cell. He is missing his lower half and is in a state of decay.
The Dialogue and The Swarm
Listen to DogDay’s warning. He explains that CatNap worships the Prototype and that the other critters have gone feral. As he finishes speaking, the Mini Smiling Critters (small, possessed plushies) will swarm him. You cannot save DogDay. He will be possessed and turn hostile. You must run.
The Chase Through the Tunnels
This is a high-speed chase sequence. The possessed DogDay is fast.
- Use the Flare Gun: If you have acquired the flare gun (or using your heavy object interaction), you can stun the pursuing enemies.
- Close Doors: As you run through the cells, slam gates behind you to slow him down.
- The Mini-Critters: Do not let the small plushies surround you. They will jump on your face and kill you. Shake them off or shoot them away.
After escaping the Playhouse, you will emerge back into the Dome, but the atmosphere will have shifted. The presence of CatNap is now much more aggressive.
6. How to Restore Power in the Counselor's Office
The Counselor's Office is the final major puzzle hub before the endgame. This area is less action-heavy but requires significant logical thinking. The building is a maze of offices and walls that require power to open.
The Sliding Power Puzzle
The core mechanic here involves a movable power source.
- Cable Management: You have a limited length of cable on your GrabPack. You must route the cable around pillars and through windows to ensure it reaches the socket without snapping.
- The Pivot Point: In the main office, there is a power pole on a sliding track. You must power the pole, then use your other hand to slide the pole across the room to a new receiver, transferring the electricity to the next sector.
The Keycard Hunt
To access the Generator room, you need a specific keycard hidden in the office archives.
- Search the Drawers: The keycard is physically hidden inside a file cabinet. You must open drawers systematically.
- The Red Light: While searching, keep an eye on the red light in the corner. If it turns off, CatNap is nearby. Hide in a locker immediately.
Once the power is restored, the final barrier to the Gas Production Zone is removed.
7. Navigating the Gas Production Zone
This is the belly of the beast. The Gas Production Zone is where the Red Smoke is manufactured. It is dark, industrial, and filled with gas leaks. You will need your Gas Mask equipped for almost 100% of this section.
The Battery Transport
Your objective is to move a massive battery from the intake to the main elevator. This requires operating a crane.
- Crane Controls: Use the control console to move the crane claw.
- The Maze: The battery must be guided through a labyrinth of conveyor belts. You must run ahead of the battery to switch tracks and open gates.
- Enemy Spawns: While moving the battery, noise will attract enemies. Keep your head on a swivel.
8. Surviving the Nightmare Huggy Wuggy Encounter
While traversing the gas-filled tunnels, you will be subjected to a potent hallucination. You will find yourself in a warped version of the Chapter 1 lobby. A "Nightmare" version of Huggy Wuggy will emerge from the television screens.
The TV Mechanic
This fight is not physical; it is a game of observation.
- Watch the Static: Nightmare Huggy travels through the TVs. Look for the screen that has heavy static and a distorted face.
- Look or Look Away? Unlike Miss Delight, you usually need to look at him to force him back, but listen to the audio cues. If he screams, he is about to lunge.
- The Real World: Remember, you are hallucinating. If you take off your mask, you die from the gas. If you fail the hallucination, your mind breaks.
Survive the sequence until the hallucination fades, leaving you at the entrance to the main generator room.
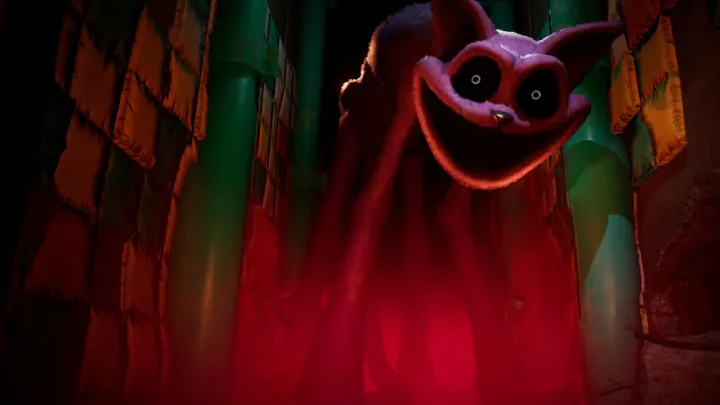
 9. The Final Boss: How to Defeat CatNap
You have reached the climax. CatNap awaits you in the central chamber. He is massive, skeletal, and emits constant Red Smoke. This boss fight is divided into phases and requires mastery of the Green Hand (Charge) mechanic.
Phase 1: The Hide and Seek
CatNap will stalk around the ceiling and the perimeter. He is invulnerable to direct attacks.
- The Four Corners: There are four power stations in the corners of the room. Your goal is to charge them.
- Charging: Use the Green Hand to grab a charge from the central node, then sprint to a corner station to deposit it.
- Defense: While charging, CatNap will try to swipe at you. Watch for the red warning indicators on the screen. If you see a paw coming, jump or dodge.
Phase 2: The Red Smoke Storm
CatNap will fill the floor with thick smoke.
- High Ground: Use the Purple Hand to jump up to the elevated platforms immediately. Staying on the ground is fatal.
- Steam Vents: CatNap will try to climb the platforms. Use the steam vents to spray him, forcing him back down.
Phase 3: The Supercharge
Once all four corners are powered, the central battery will unlock.
- Wait for the Lunge: CatNap will descend for a final kill. He will open his mouth to swallow you.
- The Green Hand: You must hit the supercharged green node in the center, then shoot the charge directly into CatNap (or the mechanism above him, depending on the patch version) to trigger a massive electrical discharge.
The electricity will overload CatNap, setting him on fire and causing him to collapse.
10. The Truth and The Angel of the Hour of Joy
With CatNap defeated, he will look up toward the ceiling. The Prototype's hand (Experiment 1006) will descend. CatNap, still worshiping his god, offers himself. The Prototype violently kills CatNap and drags his body away to be added to his own mass.
The Final Tape: The Hour of Joy
Proceed to the control room. Here you will find the final VHS tape. Insert it.
- The Revelation: The tape shows the security footage from August 8, 1995. It depicts the Smiling Critters and other toys systematically slaughtering the scientists and staff. This was a coordinated military-style execution led by 1006.
- Poppy's Change: Poppy reveals that she was there. She saw the bodies. She initially wanted you to leave, but now she changes her mind. She says you are too capable to let go.
The Ending
You board the elevator expecting to leave. Poppy re-routes the elevator to go down, deeper into the factory. She states, "We need to kill him. The Prototype." The chapter ends as the elevator descends into the darkness, setting the stage for Chapter 4.
Conclusion
Conquering Poppy Playtime – Chapter 3 is a test of endurance and nerve. To succeed, you must master the line-of-sight stealth needed for the School, the physics-based platforming of the Purple Hand, and the resource management of the Gas Mask. The defeat of CatNap is not just a victory over a monster, but a step toward confronting the true evil of Playtime Co. With the power restored and the truth of the Hour of Joy revealed, you are now locked on a collision course with The Prototype. Keep your GrabPack charged; the descent is far from over.


